Introduction: Why Non-Verbal Cues Matter
“How to develop non-verbal cues for classroom management” is a question every educator faces — especially when frequent verbal reminders interrupt the flow of instruction. Non-verbal signals create a silent channel of communication that complements spoken directions, helping to maintain student focus, reduce disruptions, and support diverse learners. In this guide, you’ll explore the principles behind effective non-verbal cues, learn to design a system tailored to your classroom’s unique needs, and discover strategies for implementing and refining your signals over time. By the end, you’ll have a clear roadmap to transform simple gestures, signs, and visual prompts into a powerful toolkit for managing behavior and fostering engagement.
Understanding Non-Verbal Cues in Classroom Management
Non-verbal cues are intentional, silent communication tools—encompassing gestures, facial expressions, physical positioning, and environmental modifications—that convey clear expectations and instructions without interrupting the learning process. These powerful signals create a seamless bridge between teacher intention and student response, fostering an atmosphere of mutual understanding and respect.
Core Benefits:
• - Minimize disruptions: Students recognize signals instantly and self-correct behavior without public attention or embarrassment, maintaining dignity while addressing off-task conduct.
• - Preserve instructional momentum: Eliminates the need for repeated verbal reminders, announcements, or warnings that fragment lessons and steal precious learning time from the entire class.
• - Support diverse learners: Provides visual and kinesthetic communication pathways that benefit students with hearing impairments, language processing differences, attention challenges, or those for whom English is an additional language.
• - Reduce teacher vocal strain: Decreases reliance on voice projection and repetitive verbal commands, promoting teacher wellness and vocal health throughout long teaching days.
• - Build student independence: Develops learners' ability to read environmental cues and respond autonomously, fostering self-regulation skills that transfer beyond the classroom.
• - Create calmer environments: Establishes a peaceful, focused atmosphere where learning can flourish without constant verbal interruptions or power struggles.
• - Enhance classroom equity: Provides consistent, clear communication that doesn't favor students with strong auditory processing skills over those who learn better through visual channels.
This silent language becomes the foundation for a respectful, efficient classroom community where every student can access instruction and participate meaningfully in their educational journey.
Types of Non-Verbal Cues
Types of Non-Verbal Cues
1) Hand Signals
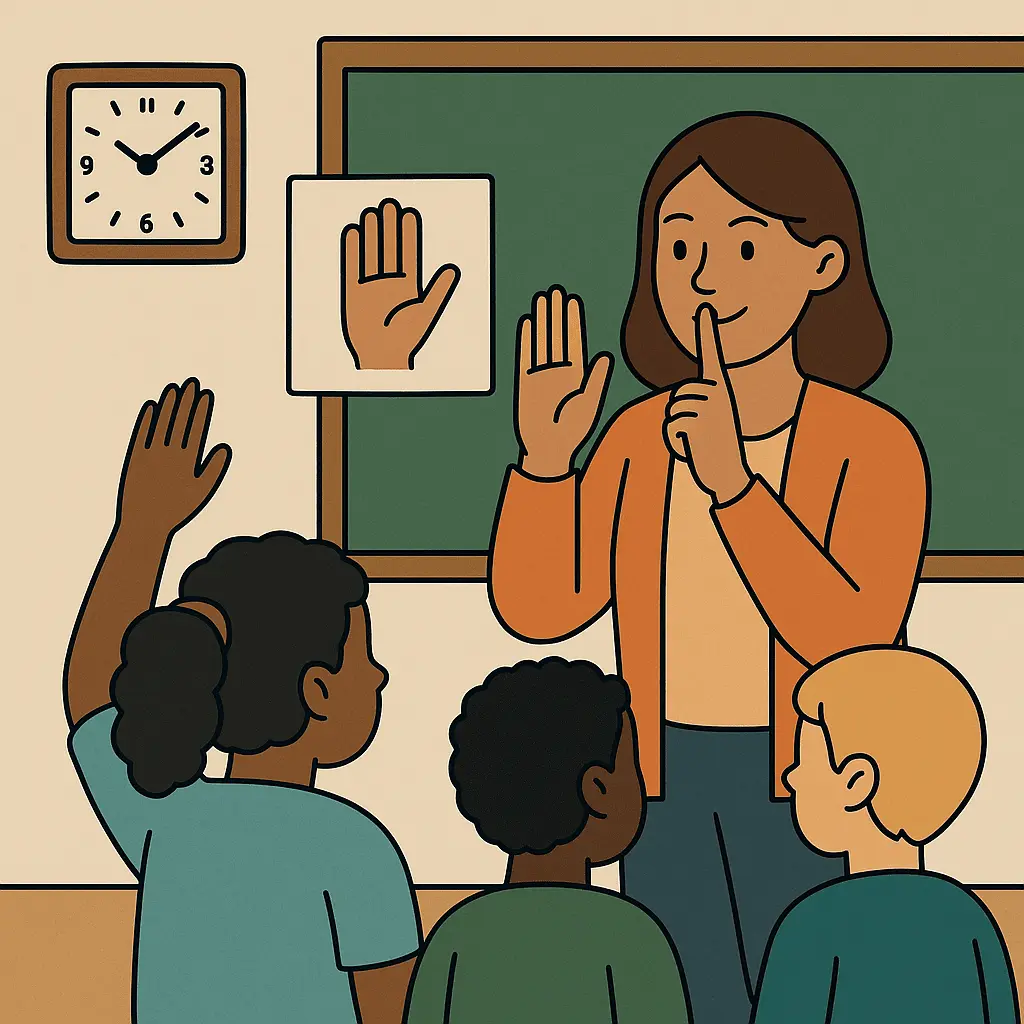
Clear, purposeful gestures that communicate specific actions or expectations. Examples include: raised palm for "stop" or "freeze," finger to lips for "quiet," thumbs up for approval, counting fingers to indicate time remaining, or pointing to designated areas for transitions.
2) Facial Expressions
Subtle yet powerful visual cues that convey emotion and instruction. A calm, encouraging smile signals approval and comfort, while a gentle raised eyebrow captures attention without disruption. Maintained eye contact shows engagement, and a slight head nod confirms understanding or permission.
3) Proximity Control
Strategic positioning that influences behavior through physical presence. Moving closer to off-task students redirects attention silently, while stepping back gives space for independent problem-solving. Standing near specific areas can signal where attention should focus or indicate upcoming transitions.
4) Signal Objects
Tangible tools that provide consistent visual communication. Options include colored cards for different messages (red = stop, green = go), cue sticks or pointers for direction, portable signs with key reminders, desktop flags for individual student communication, or electronic indicators like soft lights for various classroom states.
5) Rhythmic Cues
Patterns of sound that create structure without verbal instruction. Gentle clapping patterns that students echo back, soft finger taps on desks, rhythmic snapping for attention, or even silent foot tapping that observant students can follow for pacing and transitions.
6) Environmental Signals
Room modifications that communicate expectations automatically. Lighting adjustments to indicate different activity types, arranged furniture that guides movement patterns, posted visual schedules, designated quiet zones marked with symbols, or background music volume that signals transition times.
7) Digital Displays
Technology-enhanced cues for modern classrooms. Timer projections showing remaining work time, slides with visual instructions, color-coded screen backgrounds for different activities, or simple symbols displayed on interactive boards that students recognize instantly.
Identifying Your Classroom Needs
Before designing effective non-verbal cues, conduct a systematic assessment of your classroom dynamics through careful observation and documentation. This foundational step ensures your cue system addresses real challenges rather than perceived problems.
Key Observation Areas:
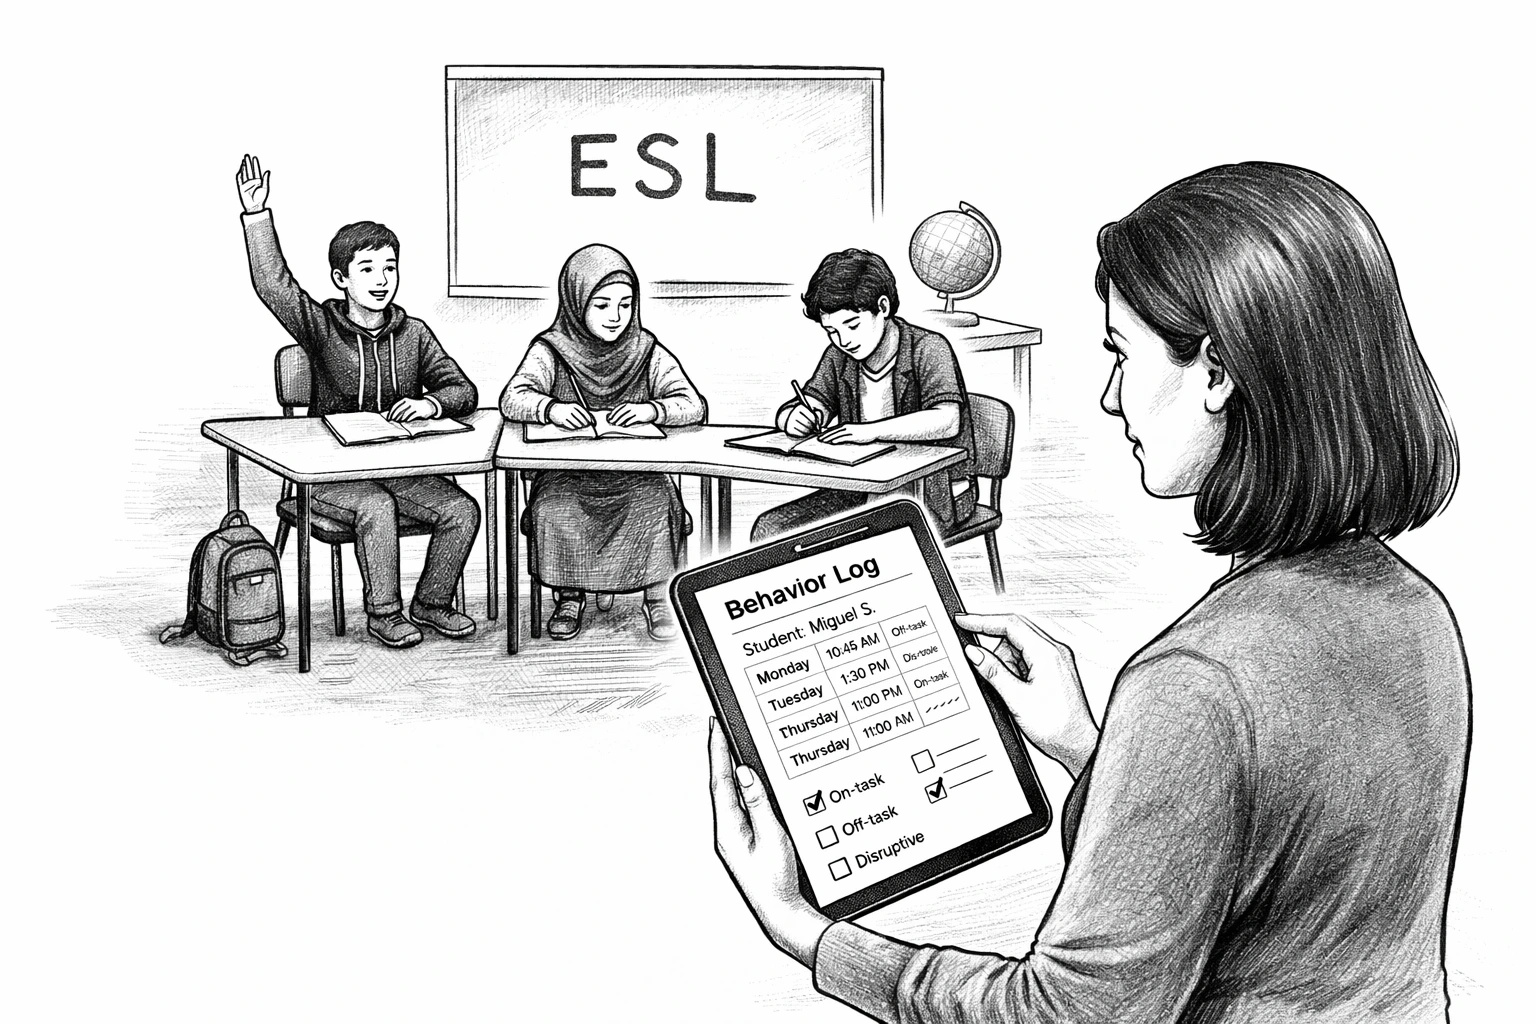
• Frequent Disruptions: Document specific instances when students talk out of turn, leave their seats without permission, or engage in off-task behaviors. Note patterns—do disruptions spike during independent work, after lunch, or during certain subjects? Record the triggers, duration, and which students are consistently involved.
• Transition Bottlenecks: Track time lost during activity changes, material distribution, or movement between learning spaces. Measure actual transition times and identify where delays occur—are students unclear about expectations, lacking materials, or simply moving too slowly? Note which transitions run smoothly versus those that consistently create chaos.
• Communication Gaps: Observe students who struggle to ask for help, appear confused but don't speak up, or need individualized attention without disrupting others. Identify learners who would benefit from discrete check-ins, private signals for understanding, or alternative ways to communicate needs.
• Attention Management: Record moments when gaining whole-class focus becomes challenging—after exciting activities, during low-energy periods, or when competing with external distractions. Note which verbal cues currently work and which fall flat.
Documentation Strategy: Create a simple observation log for one full week, using quick codes or symbols to track incidents. Include time of day, activity type, and specific behaviors. This data reveals patterns that might not be apparent during busy teaching moments.
Prioritization Process: After collecting data, identify the three most frequent or disruptive behaviors that would benefit most from non-verbal intervention. Focus on challenges that occur multiple times daily and have the greatest impact on learning time or classroom atmosphere.
This targeted approach ensures your initial cue system addresses genuine needs while building momentum for broader implementation success.
Core Principles for Effective Cues
1) Clarity and Simplicity: Each cue should convey one specific, unambiguous message. Avoid complex gestures that could be misinterpreted—simple, distinct signals create immediate understanding and faster response times.
2) Unwavering Consistency: Use identical gestures, positioning, and timing every single time. Variations in execution dilute meaning and confuse students who rely on predictable patterns for security and understanding.
3) Explicit Instruction: Never assume students intuitively understand cue meanings. Systematically teach each signal through demonstration, practice, and reinforcement until responses become automatic and confident.
4) Cultural Responsiveness: Research gesture meanings across cultures represented in your classroom. When in doubt, choose universally neutral signals or provide thorough explanation and context to prevent misunderstandings or offense.
5) Universal Accessibility: Design cues that accommodate diverse learning needs by incorporating multiple sensory channels—visual, auditory, and tactile elements ensure every student can access and respond to your communication system.
6) Age-Appropriate Design: Match cue sophistication to developmental levels—elementary students may enjoy playful gestures, while secondary learners prefer subtle, mature signals that respect their growing independence.
Designing Your Personalized Cue System
Essential Behavior-Cue Pairings
1) Volume Control (Quiet Down) Use a graduated finger-to-lips gesture combined with a gentle downward palm motion to indicate voice level reduction. Consider adding a visual volume meter display showing desired sound levels.
2) Attention Gathering (Focus) Employ a raised open palm held steady at shoulder height, maintaining calm eye contact until all students redirect their attention. Pair with a gentle, rhythmic hand motion if needed to draw wandering eyes.
3) Speaking Requests Teach the modified ASL "talk" sign (fingers at chin moving outward) or establish a simple raised-index-finger protocol that students use to indicate their desire to contribute to discussions.
4) Personal Needs (Bathroom/Break) Establish a discrete two-finger gesture or small hand-held card system that allows students to communicate needs privately without disrupting instruction or drawing unwanted attention.
5) Activity Transitions Use a consistent audio-visual combination—such as a single soft chime paired with a specific hand gesture—that signals the approaching end of current activities and preparation for the next learning segment.
6) Understanding Checks Implement thumbs-up/thumbs-down or the ASL "understand" sign (index finger tapping temple) to allow quick, non-disruptive comprehension assessment during instruction.
7) Collaboration Signals Develop specific cues for "turn and talk," "find your partner," or "return to whole group" that facilitate smooth cooperative learning transitions without verbal announcements.
Multimodal Approaches
• Visual Reinforcement Systems: Install laminated cue reference charts at strategic classroom locations, use color-coded desktop reminder cards, or project digital cue guides during initial learning phases.
• Gestural Communication: Establish a core repertoire of 6–8 essential hand signals that address your most frequent management needs, ensuring each gesture is distinct and easily visible from all classroom positions.
• Subtle Auditory Supports: Incorporate soft environmental sounds—single bell tones, gentle rain sticks, or digital chimes—that complement visual cues without creating noise pollution or startling sensitive students.
• Environmental Modifications: Use strategic lighting changes (dimming for quiet work, brightening for discussion), colored light strips for different activity types, or positioned visual timers that communicate remaining work time.
• Tactile Integration: For students with visual or attention challenges, incorporate gentle desk taps, proximity positioning, or small tactile reminder objects that reinforce visual and auditory cues.
Systematic Implementation Protocol: Begin with 3–4 core cues addressing your highest-priority management needs. Introduce one new signal weekly, providing multiple practice opportunities and positive reinforcement. Only expand your system after achieving consistent student mastery of foundational signals.
This comprehensive approach ensures your cue system becomes an integrated part of classroom culture rather than an additional burden for teachers and students to navigate.
Step-by-Step Implementation
1. Introducing and Modeling Cues
- - Launch Session: Explain each cue’s meaning, origin, and correct form.
- - Role-Play: Act out common scenarios—teacher models, then students repeat.
- - Visual Anchor: Display a poster or slide with all signals permanently visible.
2. Practicing and Reinforcing
- - Daily Drills: Embed a 2-minute cue practice at the start of each lesson.
- - Fading Verbal Prompts: Gradually remove spoken directions as students master cues.
- - Positive Reinforcement: Acknowledge quick, correct responses (“Great silence on cue!”).
Leveraging Technology and Visual Supports
- - Digital Cue Boards: Use slide decks or apps (e.g., ClassDojo) to flash signals on smartboards.
- - Countdown Timers: Pair visual timers with hand-drum taps to mark transitions.
- - Custom Icons: Create icon sets in Google Slides that tie to your hand signals.
These tech tools provide consistency and can be shared during remote or hybrid lessons.
Monitoring Effectiveness and Gathering Feedback
Continuous assessment ensures your non-verbal cue system remains dynamic and responsive to classroom needs. Implement multiple data collection methods to capture the full picture of your system's impact.
• Systematic Observation: Maintain a detailed checklist tracking each cue usage—record student response time, compliance rate, signs of confusion, and any unintended reactions. Note environmental factors that affect cue effectiveness, such as lighting, seating arrangements, or time of day.
• Student Voice Integration: Deploy regular surveys asking learners to rate cue clarity using simple scales ("I understand the hand signal for quiet: always/sometimes/never"). Include open-ended questions like "Which cue helps you most?" or "What signal confuses you?" to gather qualitative insights.
• Quantitative Data Analysis: Track measurable outcomes weekly—transition times, frequency of verbal redirections, instances of off-task behavior, and overall lesson pacing. Create simple charts to visualize trends and identify improvement patterns.
• Peer Observation: Invite colleagues to observe and provide feedback on cue clarity, consistency, and student engagement levels during your implementation.
Refining and Scaling Your System
• Strategic Iteration: Replace cues that consistently cause confusion, cultural misunderstandings, or require excessive explanation. Test modifications with small groups before full implementation.
• Thoughtful Expansion: Once foundational behaviors are well-managed, introduce specialized cues for collaborative learning ("think-pair-share," "gallery walk"), technology protocols ("devices down," "screen share"), academic processes ("rough draft mode," "peer review"), or social-emotional support ("need a break," "ready to share").
• Institutional Integration: Document your successful cue system and share with grade-level teams, special education staff, and school administrators. Create visual guides and training materials to support school-wide adoption and ensure consistency across learning environments.
Addressing Common Pitfalls
• Signal Overload Prevention: Resist the temptation to create cues for every situation. Maintain a core set of 5–7 primary signals and introduce new ones only after mastering existing ones. Too many cues create cognitive burden rather than clarity.
• Consistency Maintenance: Combat signal decay by establishing accountability systems—designate specific times for cue practice, create visual reminders near your teaching station, or partner with a colleague for mutual observation and feedback.
• Cultural Sensitivity Assurance: Research potential cultural meanings of gestures before implementation. When introducing new cues, explicitly teach their meaning and provide context. Offer alternative signals for students who may find certain gestures uncomfortable or inappropriate.
• Inclusive Participation Support: Address student reluctance through private conversations, offering alternative participation methods (personal cue cards, written responses), and creating multiple pathways for communication. Some students may need modified cues due to physical limitations, cultural background, or personal comfort levels.
• Technology Integration Challenges: When incorporating digital cues, ensure all students can see displays clearly and have backup analog signals for technical difficulties.
This comprehensive monitoring and refinement approach transforms your cue system from a static set of signals into a living, breathing communication framework that evolves with your classroom community's needs.
Case Studies: Success Stories
1) Elementary Art Class
- - Challenge: Loud chatter during demonstrations.
- - Solution: Introduced a silent clap-pattern cue: teacher claps 3-2-1, students echo, then settle.
- - Outcome: Transition time cut from 45 seconds to 15 seconds; on-task time up 18%.
2) Middle School Science Lab
- - Challenge: Safety instructions ignored in noisy environment.
- - Solution: Implemented a color-flash light cue: green = go, yellow = prepare, red = stop.
- - Outcome: Lab incidents down 40%; student self-reports of feeling “safer” increased.
Frequently Asked Questions (FAQs)
1) How many non-verbal cues should I start with?
Begin with 3–5 core signals addressing your most frequent challenges, then expand as students master them.
2) Can I use American Sign Language (ASL) signs?
Yes—simple ASL signs (e.g., “sit,” “question,” “quiet”) are universally recognized and promote inclusivity.
3) What if some students don’t notice the cue?
Pair hand signals with a subtle auditory prompt (e.g., soft tap) or position yourself in their line of sight.
4) How long does it take to see results?
Many teachers report measurable improvements in 1–2 weeks of consistent cue use, especially during transitions.
5) Are non-verbal cues effective with older students?
Absolutely—use more discreet gestures (eye signal, head nod) and involve teens in co-designing cues for buy-in.
6) How do I adapt cues for students with motor challenges?
Offer alternative formats (large cue cards, switch-activated lights) and collaborate with OT specialists for accessibility.
7) Should I involve families?
Share your cue chart in newsletters or parent-teacher conferences so they can reinforce signals at home.
8) What if students start overusing or misusing the cues?
Set clear boundaries about when cues are appropriate and model proper usage. Consider having a brief discussion about cue etiquette.
9) How do I maintain consistency across different classroom environments?
Create a portable cue reference card and coordinate with substitute teachers, specialists, and support staff to ensure continuity.
10) Can non-verbal cues work in virtual or hybrid learning settings?
Yes—adapt cues for video calls using visible hand signals, screen annotations, or chat symbols that students can recognize on camera.
11) What should I do if a cue isn't working for certain students?
Assess whether the cue is too complex, not visible enough, or culturally inappropriate. Consider student feedback and modify accordingly.
12) How do I handle cultural differences in gesture interpretation?
Research gestures that might have different meanings across cultures and choose universally neutral signals, or ask families about cultural considerations.
13) Should I use the same cues for different subjects or class periods?
Maintain core cues across all settings for consistency, but you can add subject-specific signals for specialized activities (lab safety, art cleanup, etc.).
14) How do I train classroom volunteers or aides to use the cues?
Provide a simple cue guide with illustrations and practice opportunities. Brief training sessions help ensure everyone uses signals consistently.
15) What if I forget to use the cues consistently?
Place visual reminders near your teaching area and ask a trusted colleague or student helper to gently prompt you until the habit solidifies.
16) Can students create their own cues for peer interactions?
Encourage student-generated cues for group work, as long as they align with classroom expectations and don't distract from learning.
17) How do I address parents who are concerned about "silent" teaching?
Explain that non-verbal cues supplement, not replace, verbal instruction and actually enhance communication and focus in the classroom.
18) What's the best way to introduce cues mid-semester?
Introduce them gradually during natural transition points, explain the benefits to students, and be patient as everyone adjusts to the new system.
Conclusion: Sustaining a Culture of Silent Signals
Implementing non-verbal cues for classroom management fundamentally transforms the educational environment, creating a harmonious space where communication flows seamlessly without interrupting the learning process. This silent language becomes more than just a management tool—it evolves into a cornerstone of classroom culture that fosters mutual respect, enhances focus, and supports every learner's unique needs.
The journey toward mastering non-verbal communication requires intentional planning and consistent practice. By systematically designing cues that align with your teaching style and student needs, establishing clear implementation principles, and continuously refining your approach through data collection and student feedback, you create a dynamic system that grows stronger over time.
The benefits extend far beyond reduced noise levels. Students develop greater self-awareness and independence as they learn to read environmental cues and respond appropriately. The inclusive nature of visual communication supports learners with diverse processing styles, language backgrounds, and attention needs. Meanwhile, teachers experience reduced vocal strain and increased instructional time as transitions become smoother and disruptions diminish.
Success lies in patience and persistence. Begin with just a few essential signals, model them consistently, and celebrate small victories as your classroom community adapts. Remember that building this silent language is an investment in long-term classroom harmony—one that pays dividends in student engagement, academic focus, and teaching satisfaction.
As you embark on this transformation, trust the process and remain flexible. Your classroom's unique personality will shape how these cues evolve, creating a customized communication system that reflects your community's values of respect, collaboration, and purposeful learning. The quiet confidence that emerges from this approach will resonate throughout your teaching practice, establishing a foundation for sustained educational excellence.


